October sure was busy this year and ended with one of my favorite holidays of the year, Halloween!
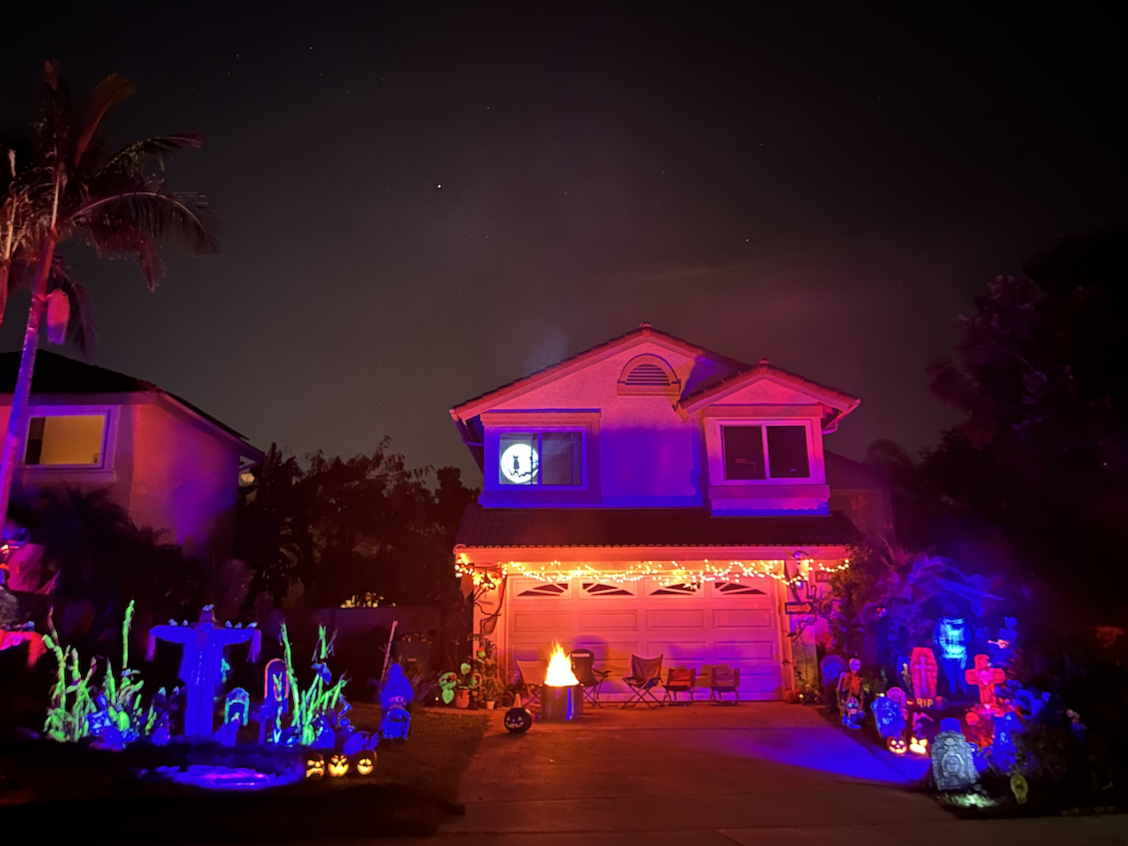
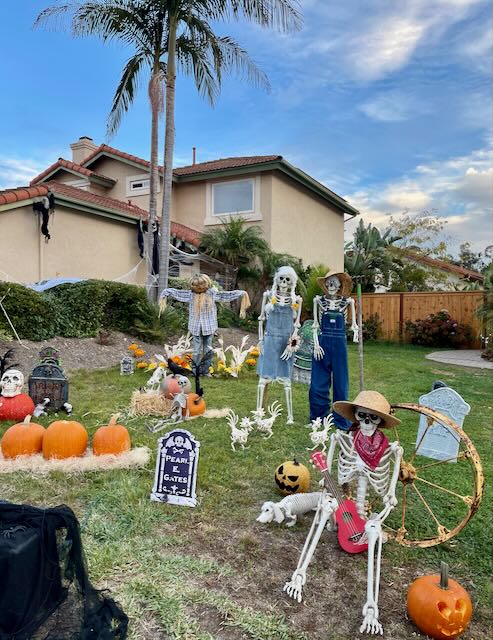
That’s our yard above and below is a little recap of our outdoor Halloween decorations for 2023. Hope you like them!
Skeleton Dudes with Signs
We started the month off with a pair of skeletons propped up in the bushes. Each holding a sign with a Halloween joke or pun on it. I changed out the joke every other day or so. For the last week of the month, I changed them daily. We get a lot of foot traffic by our house with kids walking to and from school each day. It was fun to hear them stop to read the joke since I’m usually working in my garage studio and can easily see and hear what’s going on out front.
I’ll be doing our skeleton dudes with signs again next year because they were such a hit! Here are a few of my favorites from the month.


Scarecrows
We like to set up a portion of our outdoor Halloween decor for most of the month. Every year I pick a different theme for the yard so it’s not the same thing year after year. I realize this is probably more work. But it makes it fun for me to decorate and for the kids in our neighborhood since they never know what to expect. This portion needs to look great during the day and night since it’s seen all month long. I went with scarecrows and crows in a cornfield this year. Why crows? Well, throughout the summer and fall thousands of crows fly over our neighborhood every evening. It just seemed fitting to incorporate them into our decor.
I made a total of 4 scarecrows. 2 were on our main lawn, 1 was in the bushes leading up to our front door, and 1 was only for Halloween night. This one is motion-activated to make sounds and light up when kids walk by to the front door. They are each made up of skeleton bodies and other materials, props, and old costumes I already had on hand. If you’re like us you may have lots of broken skeleton parts. Don’t toss them! They are perfect for this type of project and can be re-purposed into something new each year.
Here are each of the scarecrows in more detail:

1. Pumpkin Scarecrow
He is made from a headless skeleton body with a light up pumpkin as the head. I attached the skeleton body to a 5′ wooden stake with a zip tie. (The wooden stakes are the 1″ square kind that come with vine-type plants like bougainvillea. You can also find them in the garden section at your local hardware store.) The skeleton arms are not used since they don’t go out so they are just hanging down underneath the shirt. The ‘arms’ are another wooden stake that is secured to the top of the 5′ stake with zip ties. I dressed him in an old flannel + overalls and then hammered the 5′ stake into the ground to hold the prop up.
Once he was up and secure, I stuffed the feet and hands with small bundles of raffia. And made a raffia necklace to tie around his neck. The fake crows have small wires at their feet that I stapled through the shirt to the wooden stake being used as the arms. The head is a light-up pumpkin that I purchased at Home Depot a few years ago and secured to the top of the skeleton body + wooden stakes with wire. The pumpkin head is battery powered and has a timer so I turned it on at 5pm the first night and set it to timer and didn’t have to touch it again until the batteries ran out. I only had to change the batteries once the whole month, which is pretty amazing. This scarecrow was a real crowd favorite throughout the month! The firelight really made him come to life at night.

2. Traditional Scarecrow
I made this scarecrow almost the same way as the pumpkin scarecrow, but this skeleton body does have a head. He’s dressed in old Dickies pants that I cut jagged edges into at the bottom and an old plaid shirt I found at a local thrift shop. I used small bundles of raffia for the hands, feet, and necklace. His mask is from one of my son’s old scarecrow costumes. The hat is a cheap cowboy hat from Party City that I shredded the edges of and cut a few holes in to make look more worn and beat up. The little crows are attached with staples to the wooden stake being used at the arms. The one on the hat is attached with a wire.
This traditional scarecrow was the center of the cornfield. The cornfield is made of dried corn stalks painted with neon yellow spray paint so they glow in the black light. There are crows, pumpkins, tombstones, and a few skeleton farm animals (chickens, cats, crows, and dogs) placed throughout that area too. They all have small touches of glow paint in various colors so they pop in the black light.
Overall, I think this side of the yard turned out great! It was the perfect background for our singing pumpkins which are highlighted below.

3. Scary Scarecrow
This scarecrow was so fun to make! The head, torso, and 1 arm were all that was left on one of our skeletons but it was the perfect start for building a scary scarecrow. I started with the same basic mechanics of the 2 scarecrows above securing the skeleton body to 2 wooden stakes (one to be the ‘arms’ and the other to stake into the ground). Then I added lots of twisting grapevine branches from our garden to create his body and hands. These were attached with zip ties and various types of floral wire that I had on hand. I found a crow mask at Target to use for his face and purchased the hat and cloak from Amazon. I also added hints of graphite & tan spray paint to the hat and cloak and shredded up the ends of the robe fabric so everything looked more worn and tattered and he had a larger fake crow resting on his shoulder. This scarecrow was placed along our walkway to the front door with a purple light on him for Halloween. Above is a photo from the design process.

4. Animatronic Scarecrow
We’ve had this prop from for a few years and last year the pop-up mechanism on his head broke. I always try to re-purpose things however I can. So, decided to give him a little makeover and it worked out great!
I wanted his face to light up so I ripped off the original hat and burlap face. Then put on a light-up pumpkin face mask with green eyes that I found at Target. Since the head wasn’t popping up anymore I figured this would help it look better and be a distraction on our walkway. I also wired in broken skeleton hands so they looked more realistic. The hat and trench coat are both from an old costume that we had used in the past. The sounds worked great and went off every time kids walked by on the way to our front door. Sadly I didn’t get a photo of his finished look. But you can see his green eyes from where he’s hiding in the bushes on the right above.
Projections


I’ve been a huge fan of AtmosFX projections for a long time and we use them every year for Halloween! They can really add that extra special touch to liven up the yard. This year we had 2 projections going. Up in the window we used Perchers of the Night. It’s just a simple moon scene with a few critters going by, but it was perfect for the cornfield.
We also had the singing pumpkins. Everyone loves these, especially the little kids. They sing, tell stories, and jokes, and even make scary sounds to each other. We have all 3 of the Jack-O’-Lantern Jamboree projections that they offer and play them on repeat.


Halloween Graveyard
Every yard needs a graveyard for Halloween!! They are so easy to set up and it’s a great place to use all of those broken skeletons too! We had a few gravestones mixed into the cornfield but they were the focus on the right side of the yard. There were a couple of skeletons crawling out of the ground. Others just propped up next to their tombstone, and lots of skulls and jack-o-lanterns placed throughout. We like to highlight the tombstones with glow paint so they pop in our black lights. You can also paint the skeletons with white glow paint so they stand out a little more too.


Walkway to the Front Door
The walkway to our front door is always my favorite part to set up! We do use some animatronics in this space so we usually set this area up the day of Halloween or the night before. I like to have enough things to look at along the walkway so kids are distracted and get a little scare when they set off one of the animatronics.
How we decorated our front walkway:
This year we started off the walkway with piles of skeleton head candles (an idea I took from Survivor’s tribal council) and a skeleton holding the candy sign. The walkway is covered with black garden fabric so kids can’t see where the step pads are placed. I draped cobwebs everywhere including the plants on both sides and even over the walkway a few times so it had a tunnel-like feel. At the front, I draped black spooky fabric everywhere. Two of the scarecrows were placed in the bushes, behind the Scary Scarecrow we placed a jumping spider, and the Animatronic Scarecrow made sounds on his own when kids walked by. In the plants and trees, there were a variety of small props including skeleton heads, bats and bat skeletons, chains, and more. We also have a fog machine at the front door which really adds to the spookiness.
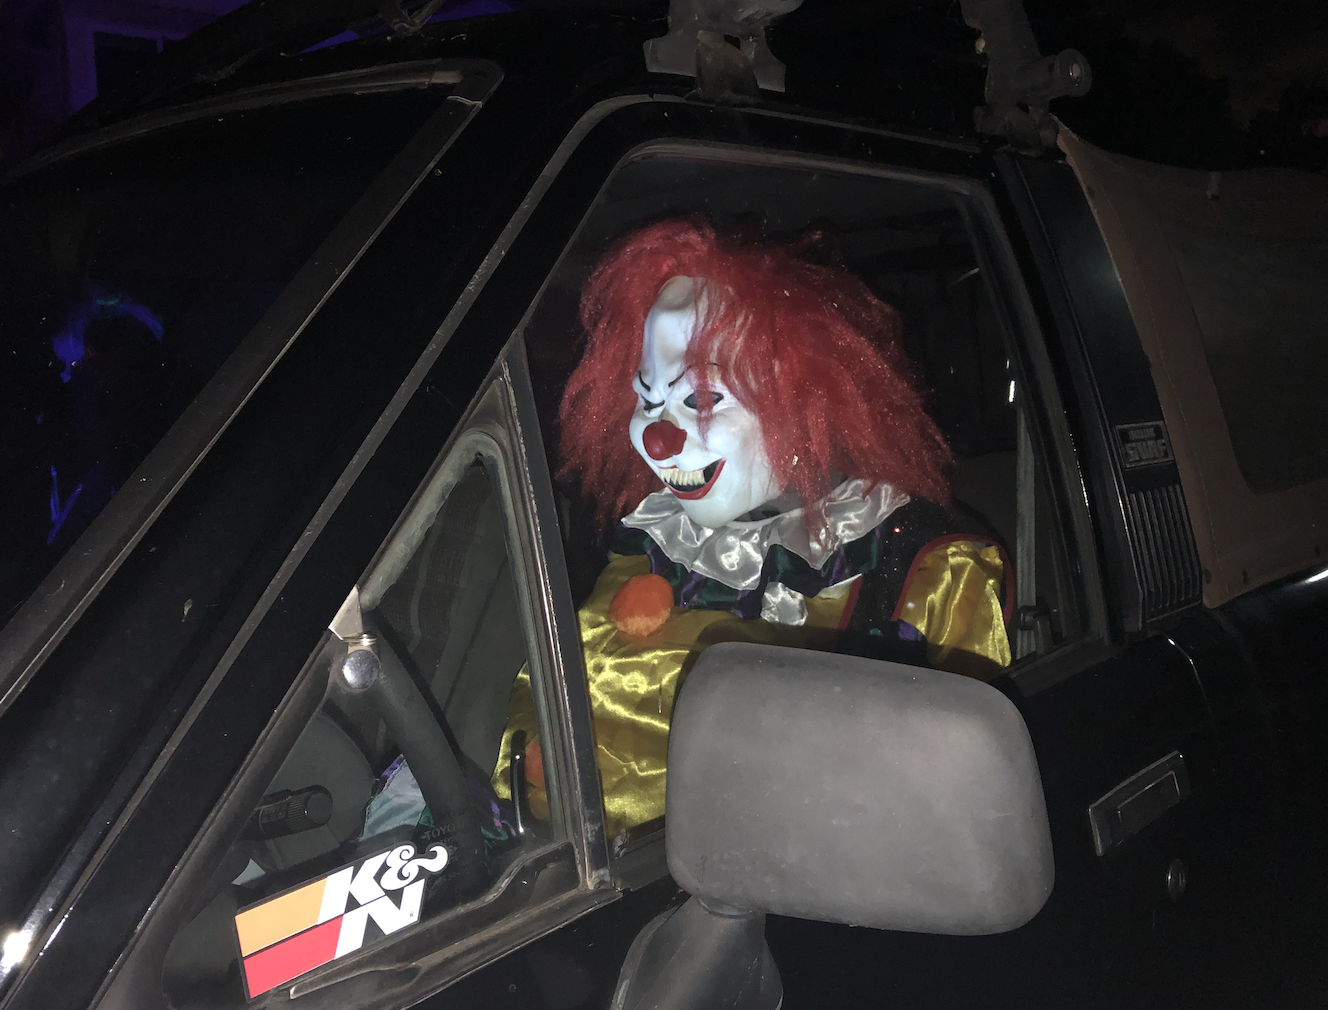
But our favorite part is the ‘person’ holding the candy bowl. For a portion of the night, it’s just a prop… a skeleton dressed in a Pennywise costume propped up on a stool and holding the candy bowl. But, halfway through the night, my 14 year old son changed into the suit so he could sit there and scare kids as they went to grab candy. He had the best time! And no one could tell the difference between the prop and the real thing! Can you?
Hope you enjoyed my little Halloween 2023 recap and video above! There are so many other things we did, but these were my favorite. As always feel free to comment. Or send us a message if you need help re-creating any of these looks for your own Halloween decor. Happy Haunting!


